fMRI Equipment setup
Table of contents (toggle arrows)
DBIC daily setup
step 1
Scanner Projector Computer
- Log in: [ username: mruser, password: mruser ]
- On login, Chrome automatically brings up login + pass for projector control
- turn projector on (this takes 7 minutes) in the scanner project PC.
- When running experiment, always make sure
Shutter off - + Check projector settings by clicking on the
statusmenu
step 2
Screening form
- Same PC as Scanner Projector PC
- Get safety screening signed
- Log participant into REDcap system
- (Chrome comes on automatically which allows adding a participant)
    1. Dartmouth id > SID
    2. Gender (default female. Double check if participant is male!)
    3. Race/ethnicity (information should be filled in safety form)
    4. Make sure to get the correct DBIC study number in - spacetop is 1076
- Add SID and accession number to scanner notebook
- Add SID and accession number to ST_participant spreadsheet
step 3
Spacetop PC and MRI devices
- Screen: Plug video VGA via USB-C adapter to Stim PC
For Audio
- Turn on Volume box: Pyle. Stereo power amplifier 2x15w
- Plug audio splitter (aux cable) to Stim PC
For Response:
- Configure button box
- For 2-button box: select HID key 2x2 12345
- For trackball: select track
- Plug button box USB to Stim PC
- If using multiple response devices, be ready for switching out devices
- Prep Trackball in advance and put “on deck”
step 4
Medoc PC: Medoc TSA setup
- Turn TSA-II on before experiment, for safety test to pass
- check green light on TSA-II
- check connection between TSA-II & medoc-PC (USB!!)
- Turn Medoc PC on and open Acknowledge software (admin/admin)
- Click participant, test, and make sure “external control” is on.
* External control “on”: External control > check box
- plug in participant information (use BIDS id)
step 5
Medoc PC - Stim PC communictaion
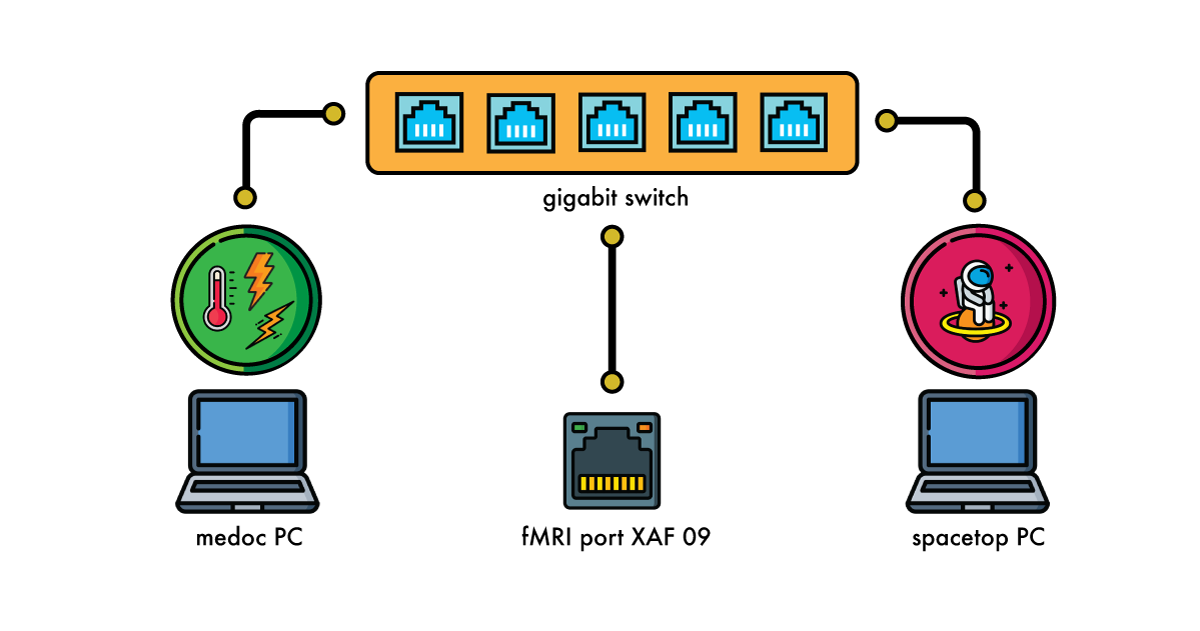
- Check if all of the ethernet cables are connected [ #LINK configuration ]
- Test 1: In the SPACETOP PC terminal, type ping 10.64.1.10 This is the ip address of the medoc PC. we’ll make sure that the spacetop can send bytes to medoc
- Test 2: turn on medoc main station program. Go into external control mode. In the SPACETOP PC, load matlab ptb3-matlab. In the command window, main(‘10.64.1.10’, 20121, 1, 100) # select Program main(10.64.1.10’, 20121, 4, 100) # Trigger Program
- run
testmain.m, which will basically do Test 2 for you.
step 7
Medoc PC: Biopac - data acquisition
- for each session, open the .gtl templates
spacetop > - in order to prevent losing any data, save the
.gtltemplate with the corresponding participant name. Make sure to save as.acq - use ctrl + space to start and stop (the button is misleading to use)
- stop between runs
- e.g. social influence has 3 runs. Use
ctrl + spaceto stop at the end of run 1,ctrl + spaceto start for run 2
- e.g. social influence has 3 runs. Use
- at the end of the entire experiment, save the template as .acq.
step 8
Spacetop PC: Matlab
- Open all relevant tasks during T1
- Double-check participant - we cannot mess this one up
- Pay attention when runs start and end
- Start key will be
sbefore the trigger. - End key will be
e
step 9
Spacetop PC: saving data
- [ Medoc ] - Are there expected number of thermodes?
- [ biopac ] save acquisition files in BIDS format
- [ spacetop PC ] push data file to github data repo
    cd home/spacetop/repos/data \
    cd sub-XXXX # subject of the day \
    git add sub-XXXX \
    git commit -m "sub-XXXX data" \
    git push origin master
step 8
After scanning cleaning
- Pull out trigger / audio from pc
- Restock the scrubs
- If laundry basket full, take it up
- Turn the TV / lights off
Dartmouth fMRI PC setup
Maintained by Heejung

fMRI jack:
XAF-09 in Moore B75 on “fmri-private network (VLAN 2554)””
medoc computer
- medoc.dartmouth.edu
- ip: 10.64.1.10
- netmask: 255.255.255.240
- default gateway: 10.64.1.1
spacetop computer
- spacetop.dartmouth.edu
- ip: 10.64.1.9
- netmask: 255.255.255.240
- default gateway: 10.64.1.1
Note from research computing:
If you need to communicate with other systems outside of the fMRI private network besides 129.170.17.4 and 10.232.11.5 then the ACLs on the network will have to be modified.
If help needed,
contact Andrew Knutsen, Technology Support Specialist or Heejung Jung, who helped set up.